Add an AirTag to a Harmony Remote


In our house, the remote in the main room is always misplaced. Somehow it is in cushions, below couches, and in the wrong room constantly. We get tired of looking for it.
Today we purchased an AirTag and just used gorilla tape to attach it to the top of the Harmony Remote. That was easy.
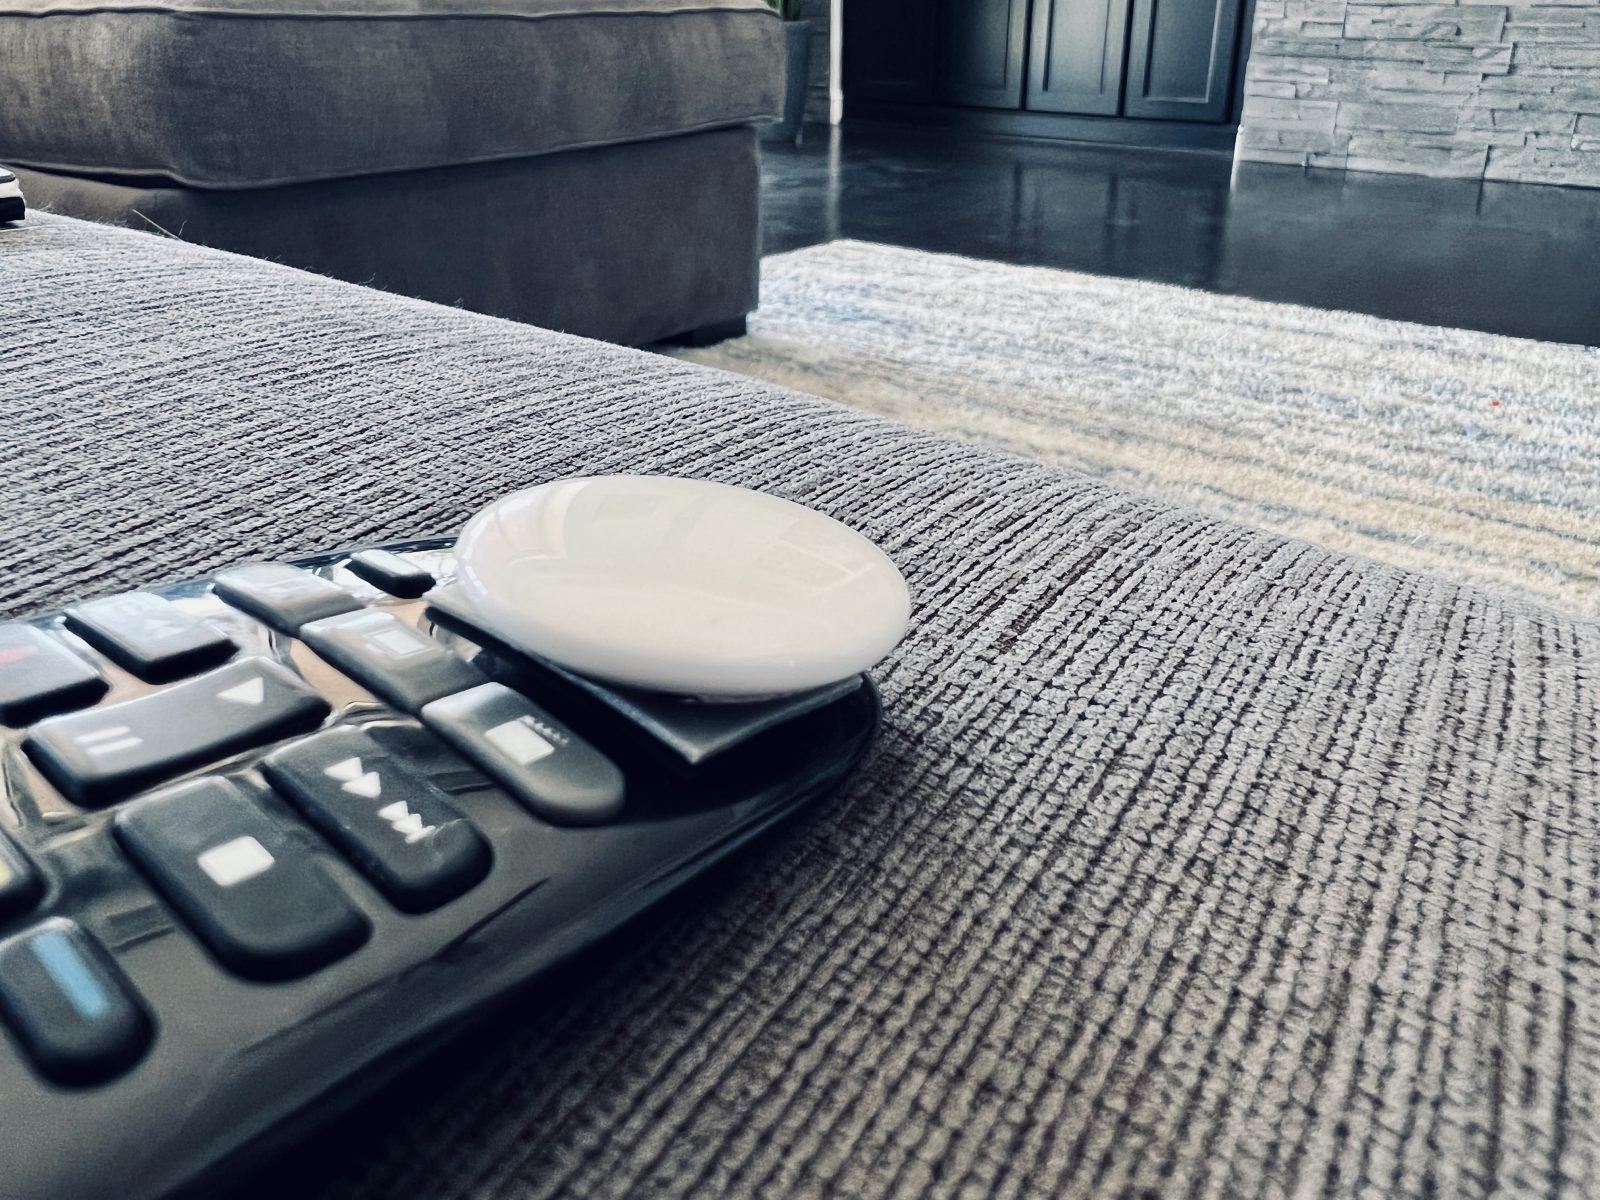
Then my youngest said, “That doesn’t seem like a dad way to do things.”
Challenge accepted.
First we took apart the remote to see what was inside. It’s real easy to remove the battery, extract two screws, and separate the top from the bottom. Once inside, we saw that there was a weight in the bottom half. It’s only purpose it to add heft to the remote.
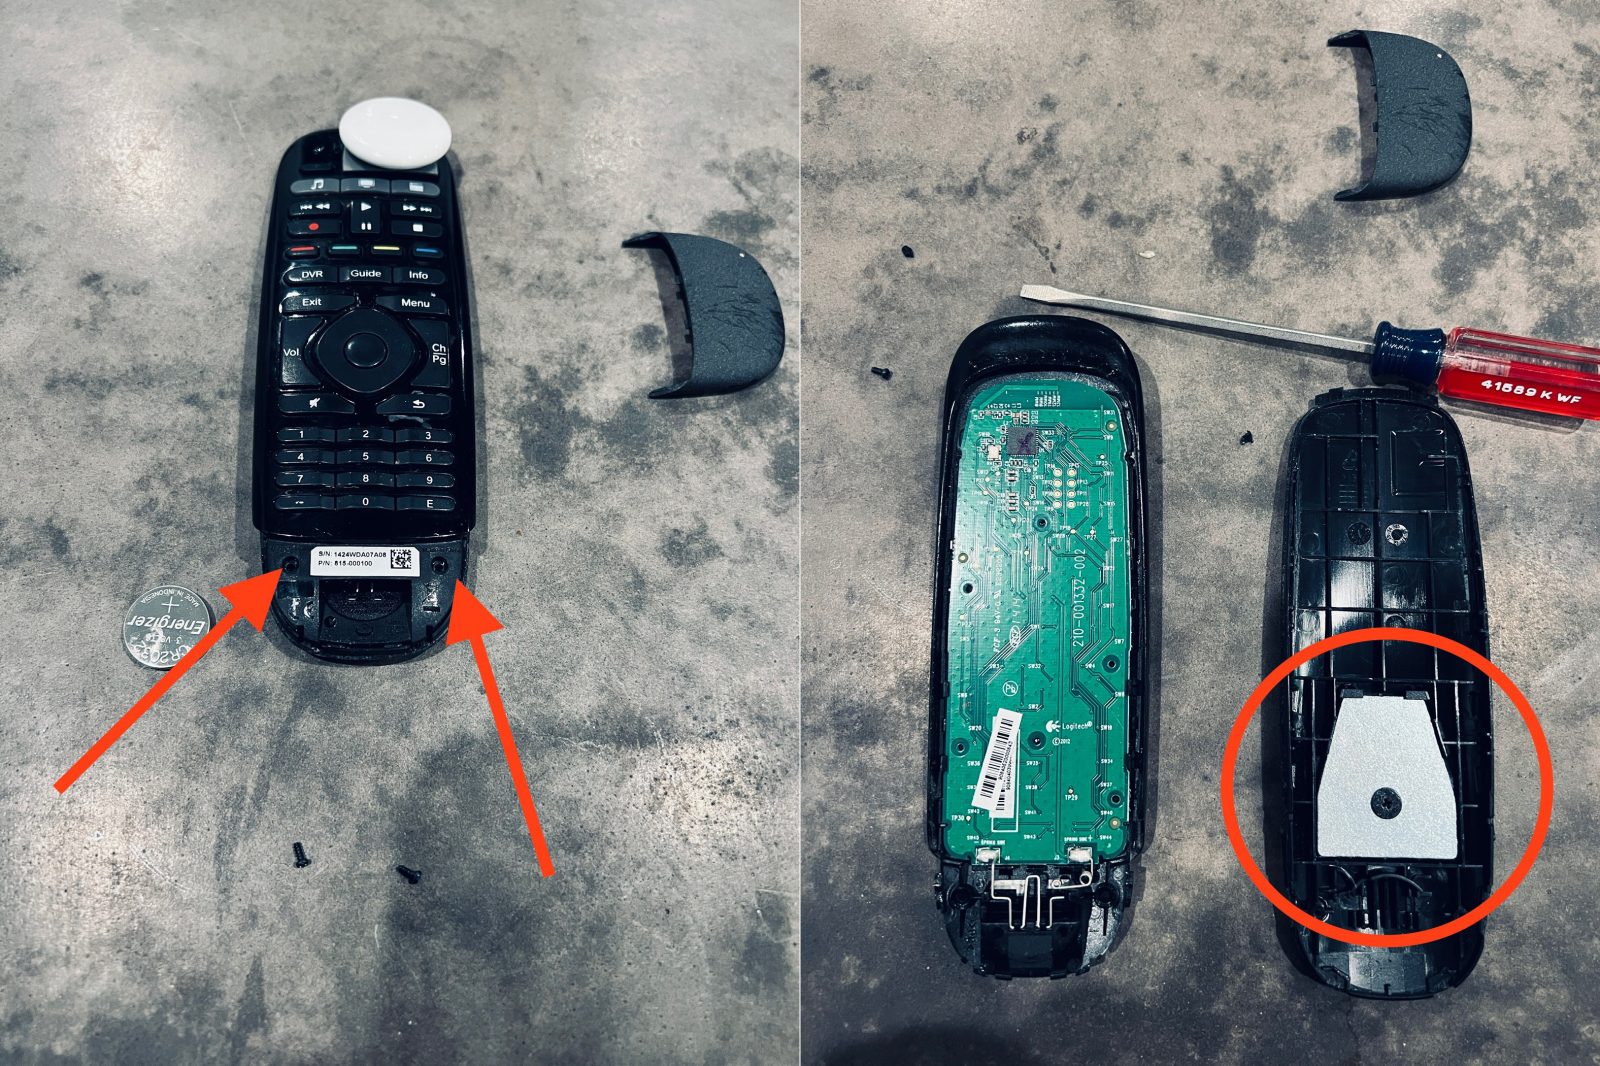
It looked like a perfect cavity to use for the AirTag.
While the width was almost perfect, the depth did not allow for the remote to go back together.
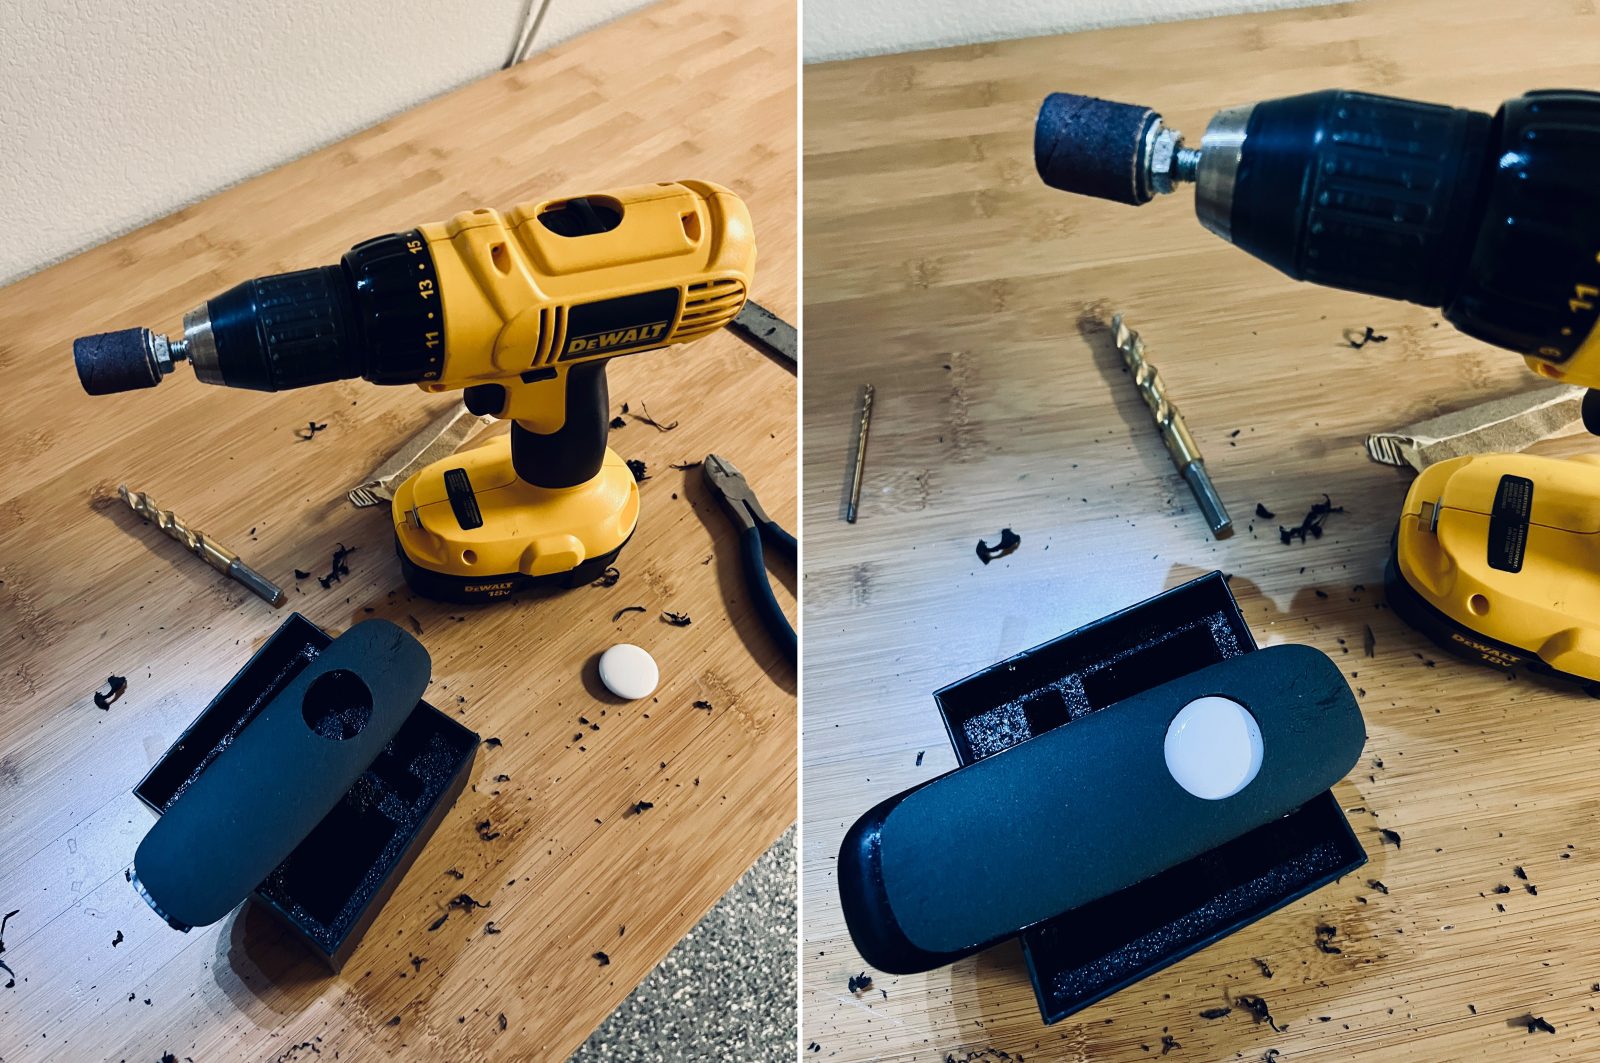
We decided to bore out a hole large enough to let the AirTag have the space it needs.
We started small and used bigger tools until we landed on a sanding wheel. The plastic on the remote was actually quite soft.
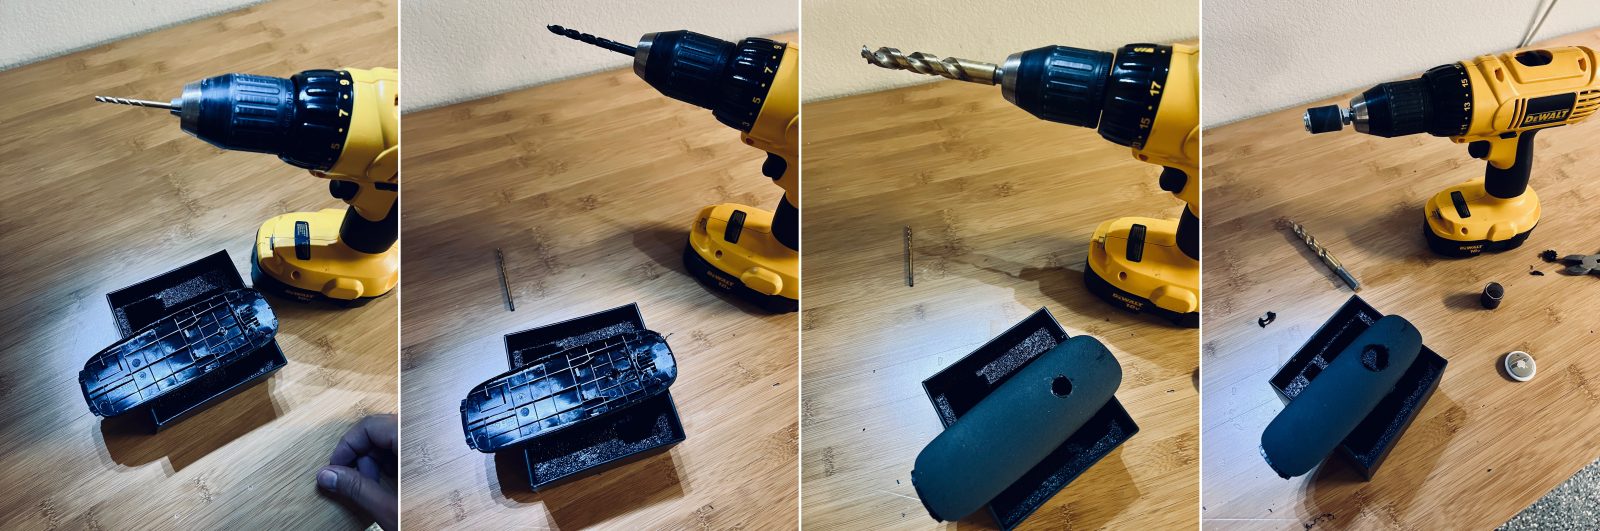
We widened it enough for the metal part to poke through. It was a perfect fit.
It also shows a cool Apple logo.
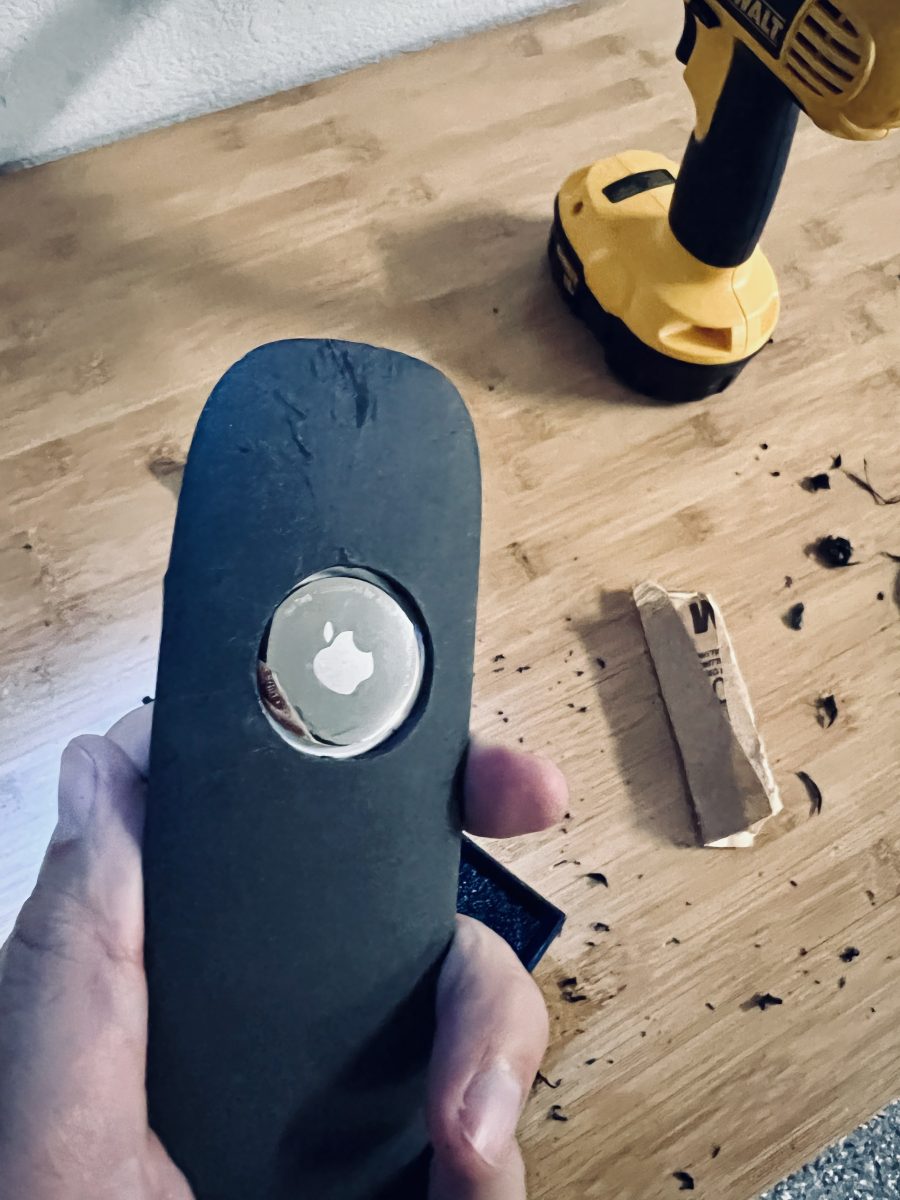
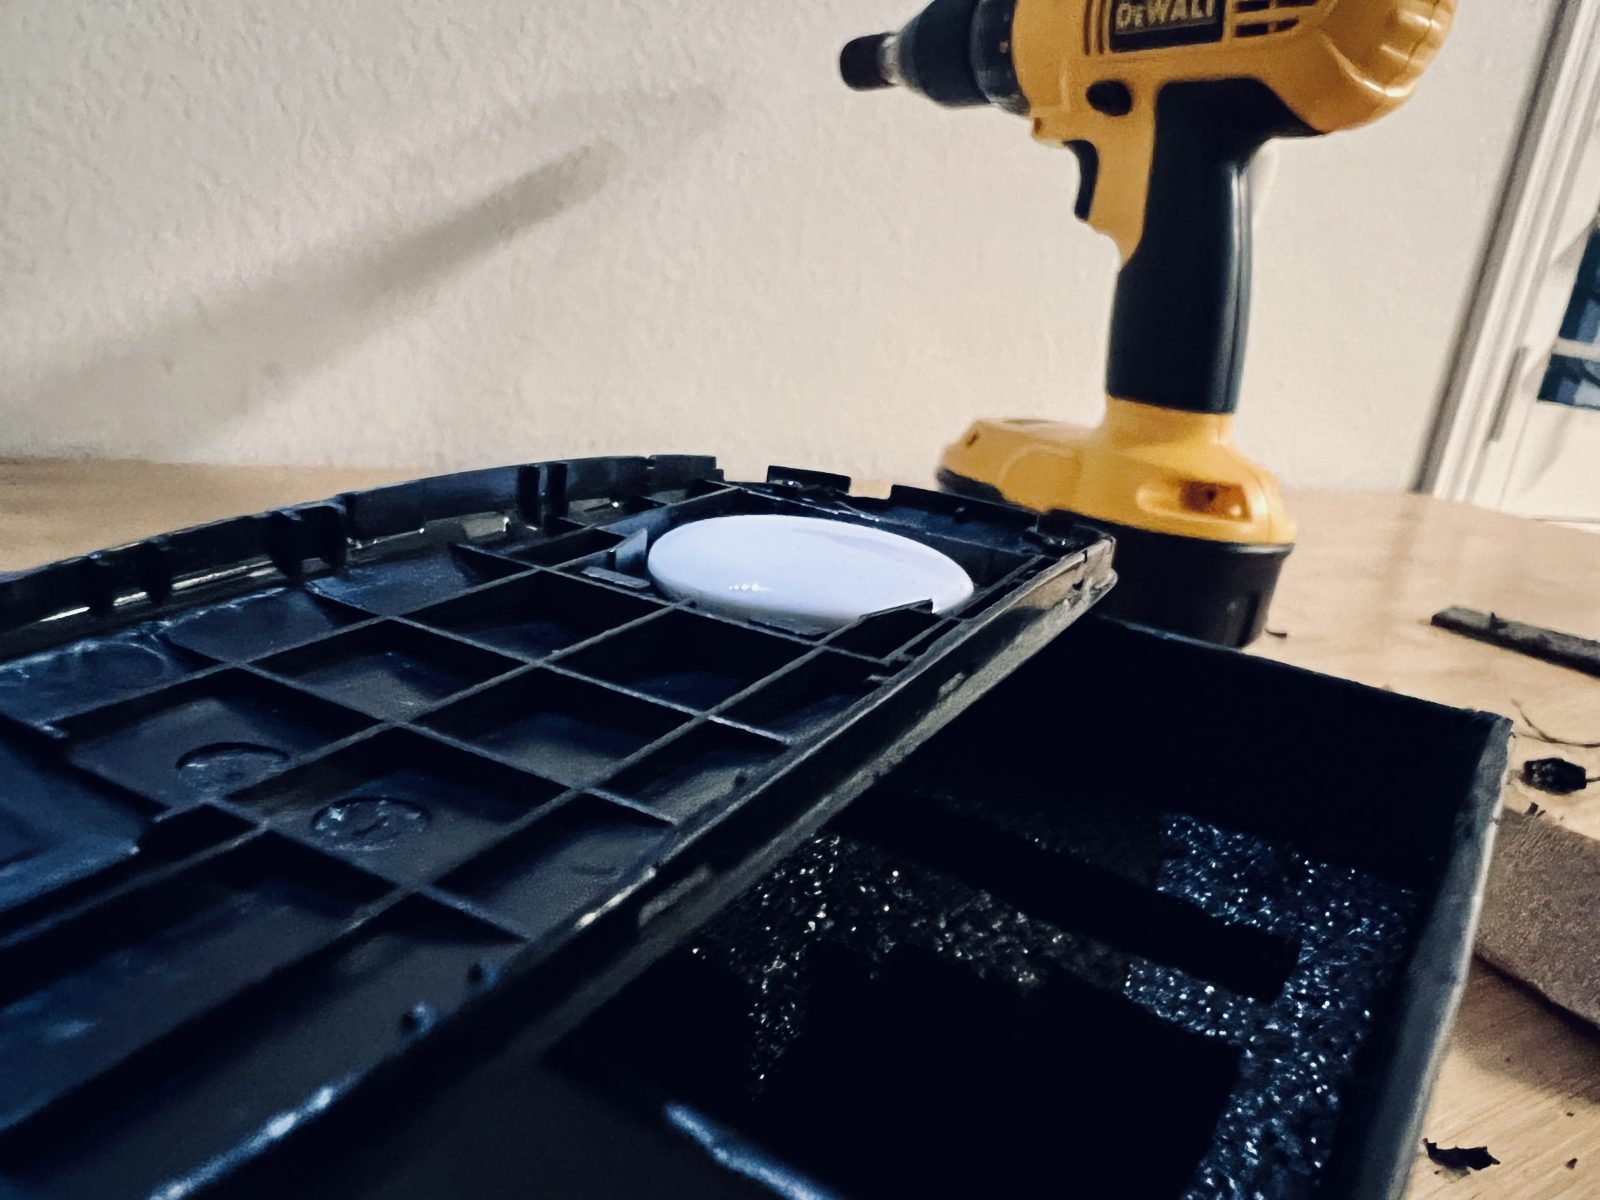
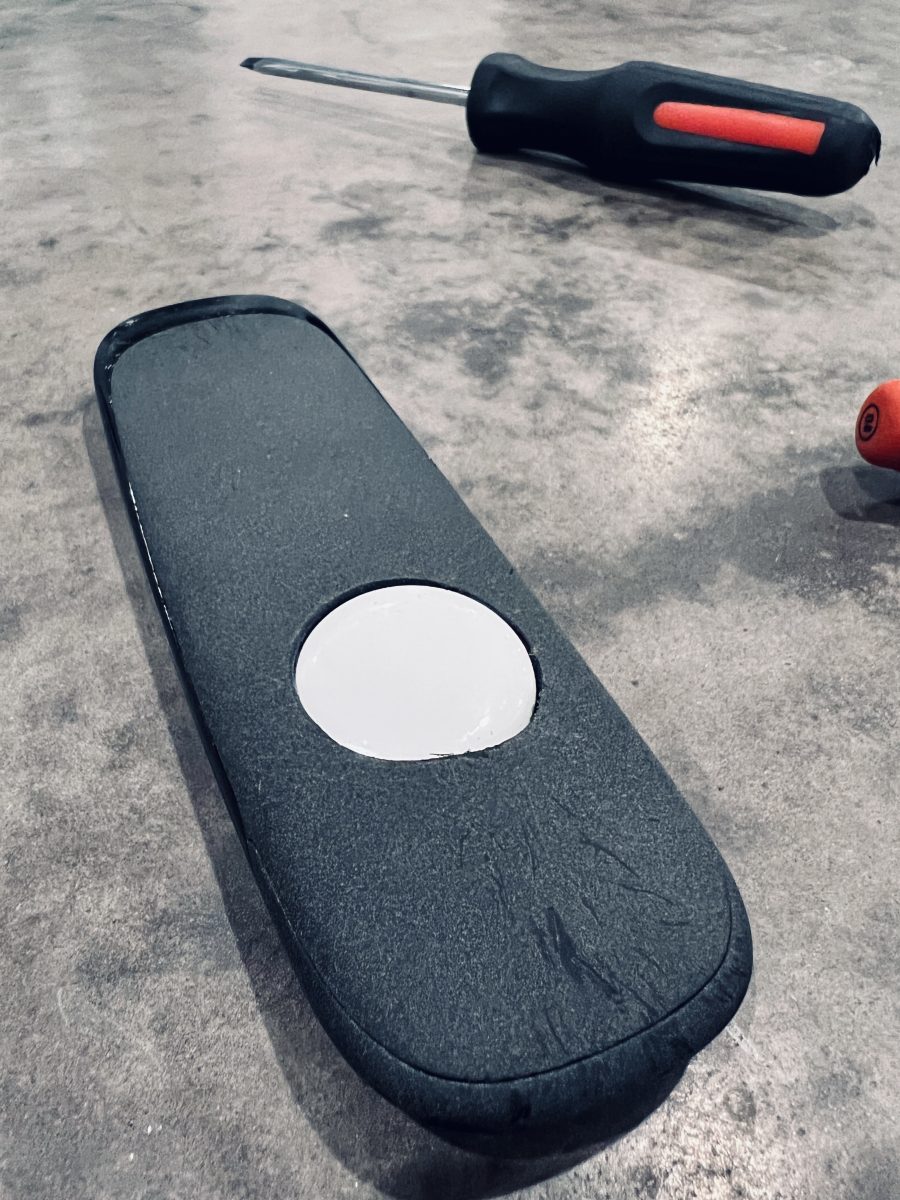
Unfortunately, the sound of a ping was so muffled. Apparently the beeping speaker comes from the white side of the AirTag.
We widened the hole just enough so the white part could have space, but not big enough that it could slip out. Be very careful because the room for error is small.
Once we had the space, we placed the AirTag, put the remote back together, and it all works great.
Now when we replace the remote we just ask Siri to find it for us.
Now that’s a much more “dad way” to do it.